How to take a screenshot on your Nexus 4

If you've picked up a Nexus 4 then it's likely that you'll already have gotten to grips with many of the devices finer features, such as PhotoSphere, Google Now or file sharing via NFC. Once thing you may not be aware of though is that you can take a screen-grab of your device, saving whatever is on your screen at the time for posterity.

Taking a screenshot really is a simple process, but if you're unsure how to begin then follow our simple step-by-step guide.
  1. Navigate to the screen image that you wish to save
  2. Hold down the ‘Power' and ‘Volume Down' buttons simultaneously
  3. You'll notice a brief flash on screen, signifying that your screenshot has now been added to your device's gallery!

How to backup and restore data on your Sony Xperia Z

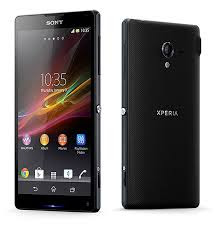
Sony’s Xperia Z is up there with the very best devices on the market. It’s fast, slick and boasts one of the nicest 5-inch displays we’ve ever clapped eyes on. The device shouldn’t run into any issues as it’s driven by Google’s stable Android 4.1.2 OS – otherwise known as Jelly Bean – but if you do run into issues and need to restore your device you’ll want to make sure you have a working backup of your data first.
Sony’s Backup & Restore app is just the ticket for managing your backups, and you should get into the habit of making a new one weekly…or if you aren’t paranoid, monthly! Also, before you undertake any sort of update or change to your device.
Here’s how you do it.
  • Grab your Sony Xperia Z
  • Tap the ‘Backup & Restore’ application
  • Select ‘Back up’
  • Hit the area beneath ‘Where to store data’ and choose a destination which is safe and secure, such as your micro SD card
  • Now, tap ‘Back’
  • Select ‘Back up’
  • Choose the data types you wish to keep backups of, such as SMS, Contacts and Bookmarks
  • Select ‘Back up now’
Wait for the process to complete.
You can restore your backup by going into the same ‘Backup & Restore’ application and selecting ‘Restore’ from the app’s menu, choose the archive you wish to restore and then select ‘Restore Now’.

How to use Facebook on your Sony Xperia Z

Everyone loves Facebook, and Sony knows it. That’s why when the tech giant rolled out its Xperia Z smartphone – a device which offers the very best of everything – it included Facebook integration out of the box.
So, if you want to set your Facebook account up on your Xperia Z you can follow these simple steps, and you’ll be networking with your nearest and dearest before you know it.
  • Grab your Sony Xperia Z
  • Tap ‘Menu’
  • Hit ‘Settings’
  • Choose ‘Add Account’
  • Select ‘Xperia with Facebook’
  • Enter your Facebook details, or if you’ve been living in a cave for the last half a decade and don’t have an account, you can create one.
If, for any reason you wish to remove your Facebook account from your Xperia Z you can do so by hitting ‘Menu’, choosing ‘Settings’ then ‘Xperia with Facebook, then hitting the options icon in the bottom corner and tapping ‘Remove account’ twice. Simple.

How to capture Time Shift images on your BlackBerry Z10

The BlackBerry Z10 is a top-notch smartphone which has some interesting and unique features. Among them is RIM’s Time Shift photography function, which allows the device to capture a number of images from which the user can select the best one.
It isn’t a terribly difficult function to make use of, but if you’re having issues getting started with it then read through this short guide and you’ll be snapping perfect images in no time!
  • Grab your BlackBerry Z10
  • Select the ‘Camera’ icon from your home screen
  • Choose the ‘Camera’ icon once again, this time from within the camera app
  • Ensure the ‘Time Shift’ icon is selected
  • Take your photo and hold the camera as still as possible until the image is displayed
  • Now simply use the slider at the bottom of the screen to choose the optimum image
  • If you don’t like any of them select the ‘Trash’ icon to ditch them all
  • Or just choose the one you like and hit ‘Tick’ to save!

How to send a file using NFC on your BlackBerry Z10

NFC (Near Field Communication) is a handy technology which allows you to send and receive data without going through the annoyance of ‘pairing’ your device with another. You can send and receive images, contact cards or even pay for a sandwich in the supermarket just by touching your device to another.
If you’re keen to start using NFC but aren’t quite sure how, then you can kick-off your experience by learning how to send a file using the tech – and here’s how:
  • Grab your BlackBerry Z10
  • Navigate to the file you want to send, this can an individual item or a group
  • Tap the ‘Share’ icon
  • Select ‘NFC’
  • Bring your device up to another compatible device, back to back
  • When prompted, hit ‘Send’
  • Your file(s) will send quickly and easily

How to get a smile in every photo with your BlackBerry Z10

We briefly touched upon using Time Shift to ensure you capture a great image every time in an earlier guide, and this time we’re focussing (no pun intended) on another key feature of RIM’s photographic app – the ability to swap out people’s faces in an image until you have a good one for every subject you’re photographing.
It really couldn’t be easier, but if you need a shove in the right direction then read on…and then get snapping!
  • As detailed in our previous guide, grab your BlackBerry Z10, ensure Time Shift is on and take your images
  • Select the best image with the slider at the bottom of the screen
  • Next, tap the face that you want to swap-out
  • Using the dial, choose the one you want from the available expressions
  • Tap anywhere on the display
  • Hit the ‘Tick’ to save!

How to use tabbed browsing on your BlackBerry Q5

The BlackBerry Q5 is the mid-range follow-up to the BlackBerry 10 powered BlackBerry Q10 and features the same web browsing functionality as the QWERTY flagship.
BlackBerry 10's native browser features tabbed browsing that allows multiple web pages to be open at once. These can then be quickly flitted in and out of or closed down from within the browser's side menu. Here's how you do it:
    1. Wake the device with an upward swipe from the bottom of the display
    2. Open the browser by tapping the 'Browser' icon from the apps screen
    1. Enter the web address or search term into the search bar at the bottom of the screen and hit 'Return' to navigate to that page
    2. Tap the 'Tabs' icon in the bottom right hand side of the browser interface
    1. Tap 'New Tab'
    2. Enter the web address or search term for the site you want to visit into the search bar at the bottom of the screen and hit the 'Return' key. This will open up a new web page.
  1. The number of open tabs will be displayed in the 'Tabs' icon in the bottom right hand side of the screen. To switch between open tabs, hit the 'Tabs' icon and then select the tab you want to open from the list by tapping on it.

How to use BlackBerry Hub on your BlackBerry Q5

The BlackBerry Q5 is powered by BlackBerry 10 and as such, brings access to the BlackBerry Hub - a handy feature that groups together all your interactions from connected accounts in one easy to reach place.
To access BlackBerry Hub:
  1. Wake the device up with an upward swipe from the bottom of the display
  2. Swipe from the left of the screen to access the BlackBerry Hub
  1. Here you will be able to access notifications from connected accounts including social networks, as well as text messages, and emails
  2. To access specific options for individual notifications tap and hold over the message's title
  1. Swipe down the right hand side of the screen to expand the available options
  1. To minimise the Hub menu, swipe from the right of the screen until only the icons are visible

How to set up an email signature in BlackBerry Hub on the BlackBerry Q5

Much like the BlackBerry Z10 and Q10, the BlackBerry Q5 has BlackBerry Hub baked in. This useful feature groups together all notifications from connected accounts and lets you send emails then and there.
Here's how to set up an email signature:
  1. Wake the device up with an upward swipe from the bottom of the display
  2. Swipe left to access the BlackBerry Hub
  1. Tap the 'Action' tab
  2. Tap 'Settings' and then tap 'Email Accounts'
  1. Select an email account and then set 'Auto Signature' to 'On'
  2. Enter into the text field the signature you want to appear on all the emails you send 
  1. Tap back to save your changes
Once you've completed those steps, the signature you've chosen will appear on every email you send from that account. If you have multiple email accounts connected to the device, you can follow the same steps to set up a signature for those too. If at any point you want to change the siganture you've entered, just go back in an enter a new one. As a default, the email signature is set to 'Sent from my BlackBerry 10 smartphone' and this will be displayed if Auto signature is set to 'On'.

How to Hard factory reset your iPhone 5

The iPhone 5 is a great addition to Apple’s hugely successful smartphone range. It sports a brighter, larger new Retina Display, updated internals and some great new photographic nous, making it a must have for all your Apple fans out there.
Perhaps the biggest selling point with Apple’s iPhones is iOS though, the company’s tremendously simple yet powerful smartphone operating system, which makes accomplishing tasks supremely easy. Sometimes though, even the most effective software goes wrong, and when that time comes there is only one thing to do – Factory Reset!
Factory resetting the device will wipe and reset everything, taking you back to scratch and (hopefully) eradicating any pesky problems which may have been impeding your enjoyment of your new iPhone 5.
If you need to reset your device, follow these simple steps: 
Before we move forward – you should be aware that what you are about do will wipe everything from your device. So make sure you have plugged your iPhone 5 into iTunes and made a back-up, because you don’t want to end up losing something of value.
  • Grab your iPhone 5
  • Hit ‘Settings’
  • Tap ‘General’
  • Right at the bottom of the screen you’ll find a tab labelled ‘Reset’ – hit it
  • On the next screen you will see a list of things which you can reset – all of which are useful in sorting out potential problems, but we’re concentrating on the whole kit and caboodle today, so go ahead and tap ‘Erase All Content and Settings’
  • You will be asked to confirm that you wish to continue, tap ‘Yes’
  • Your iPhone 5 will, after a short wait, be wiped clean, ready for you to start afresh

How To Hard Reset Sony Xperia Z

Sony Xperia Z is sleek and a complete smartphone. It is right there with the iPhone and the Samsung Galaxy S series. Just like every other smartphone, there comes a time when solving a problem with the device might prove abortive. Turning off and turning on the phone may solve the problem but in the case when the problem isn't solved, it is important to fall back to the ever effective and built-in factory reset. 

How To Hard-Reset Sony Xperia Z

How to Hard Reset Sony Xperia Z By Forcing It Off
You can force your Sony Xperia Z off by simply pressing and holding-down the Power button for about 10-15 seconds until the device is turned off.

How to Hard Reset Sony Xperia Z To Factory Settings 
Note: By initializing this process, you will loose all the data stored in your phone's memory. All settings within the apps will be lost. You will only retain the data on your card; like your music, photos and videos.

1. From your Home screen, select ‘Apps’
2. Select ‘Settings’
3. Tap ‘Backup & Reset’
4. Now, hit ‘Factory Data Reset’
5. Tap ‘Reset Phone’
6. Then hit ‘Erase Everything’

Once this process is completed, your Sony Xperia Z will reboot and may take a while during the process. It is of best practice not to interfere with the device once this process has started.

How to Hard Reset Samsung Galaxy S4

To some people, hard reset means to force something off while others refer the term hard rest as a way of initiating a device to its factory default settings. Depending on whatever your definition of hard rest is, I will walk you through how to perform a Hard Rest for Samsung Galaxy S4.

How to Hard Reset Samsung Galaxy S4 By Forcing It Off
You can force your Samsung Galaxy S4 off by simply pressing and holding-down the Power button for about 10 seconds until the device is turned off.

How to Hard Reset Samsung Galaxy S4 To Factory Settings
This is the second type of hard reset, where you restore your device to it's original factory and default settings. You can perform this by following any of the steps below.

Note: By initializing this process, you will loose all the data stored in your phone's memory. All settings withing the apps will be lost. You will only retain the data on your SD card; like your music, photos and videos.
Step A: From Phone Menus
If you can play around the menus of your phone, simply use the steps below to restore your device to factory settings.
1. Open Settings.
2. Select Accounts.
3. Select Back up and reset.
4. Tap Factory data reset.
Step B: From Phone's Startup 
This method is performed only when you do not have access to your phone menus. Basically, it is performed when your phone doesn't start up properly.
1. Ensure your Samsung Galaxy S4 is powered off, press and hold both Volume buttons, then quickly press and hold Power.
2. Keep holding all three buttons until you see the phone booted.
3. From the recovery screen, use the Volume Down button to command the selection to wipe data 
4. Now, use the Home button to select the highlighted option.

If you  followed the steps correctly, you should successfully Hard Reset your Samsung Galaxy S4.

How To Use USB Fash Drive As Virtual RAM

No matter how fast our computer might be, we always seek for ways to increase the speed. The RAM plays a major role in achieving this. But do you need to get an additional RAM everytime? No. With your USB Flash Drive, you can increase the virtual RAM and get a better speed with your PC.

6 Easy Steps To Use USB Fash Drive As Virtual RAM
How to use your flash drive as ram
1. Purchase a USB Flash Drive which should be less than 8GB
2. Insert the USB Flash Drive into any port available
3. Select "My Computer" and Locate your Flash Drive > Properties
4. Locate "ReadyBoast" Tab
5. Select "Use this device"
6. Click "Apply" and hit Ok.

Now you PC has a Virtual RAM which should speed up your device.
Hint: You won't see an increment in the size of your original RAM installed on your PC, because the USB Flash Drive acts as a Virtual RAM.